

.png)
Starting your own ecommerce business can be challenging, but the results are worth it. In addition to having a sustainable source of income, you’ll get to choose your own schedule, make key business decisions, and wear lots of different hats.
Once you’ve done some market research and decided what to sell, building a website is your next step. While this might sound overwhelming, even those without technical experience can easily create a site using Shopify.
In this article, we’ll walk through the process step by step.
Why Build a Website on Shopify?
Shopify is a popular, beginner-friendly web builder. You can use Shopify to create any kind of website, but it’s particularly useful for creating an ecommerce website. It includes many features specific to ecommerce, including tools for payments, marketing, shipping, and customer engagement.
As of 2023, about 28% of ecommerce businesses use Shopify—that’s more than 10% higher than the second most popular option.
If you’re new to the world of ecommerce, Shopify is a great place to begin. It has a user-friendly interface, affordable price tag, and attractive themes. And because each plan comes with fast, reliable web hosting, you don’t have to find hosting on your own.
Can you build a site on Shopify for free? Unfortunately, no. But while Shopify isn’t free to use, it offers a variety of plans, including a Basic option that costs less than $40 per month.
How Much Does It Cost To Build a Website on Shopify?
When you get started with Shopify, you’ll get access to a three-day free trial. After that, the first three months cost just $1 per month. Once the three months are up, you’ll pay based on the plan you choose. As of February 2024, the prices are as follows:
- Basic: $39/month paid monthly, $29/month paid annually,
- Shopify: $105 per month paid monthly, $79/month paid annually
- Advanced: $399 per month paid monthly, $299/month paid annually
Ready to get started? Keep reading to learn how to build a website on Shopify.
Step 1: Set Up Your Site on Shopify
Before getting to the fun part—designing your store—you’ll need to set up a Shopify account and iron out a few details.
Create a Shopify Account
To create your Shopify account, go to Shopify.com and click the Start free trial button in the upper right-hand corner. Enter your email address and create a password, then choose which country your business is located in.
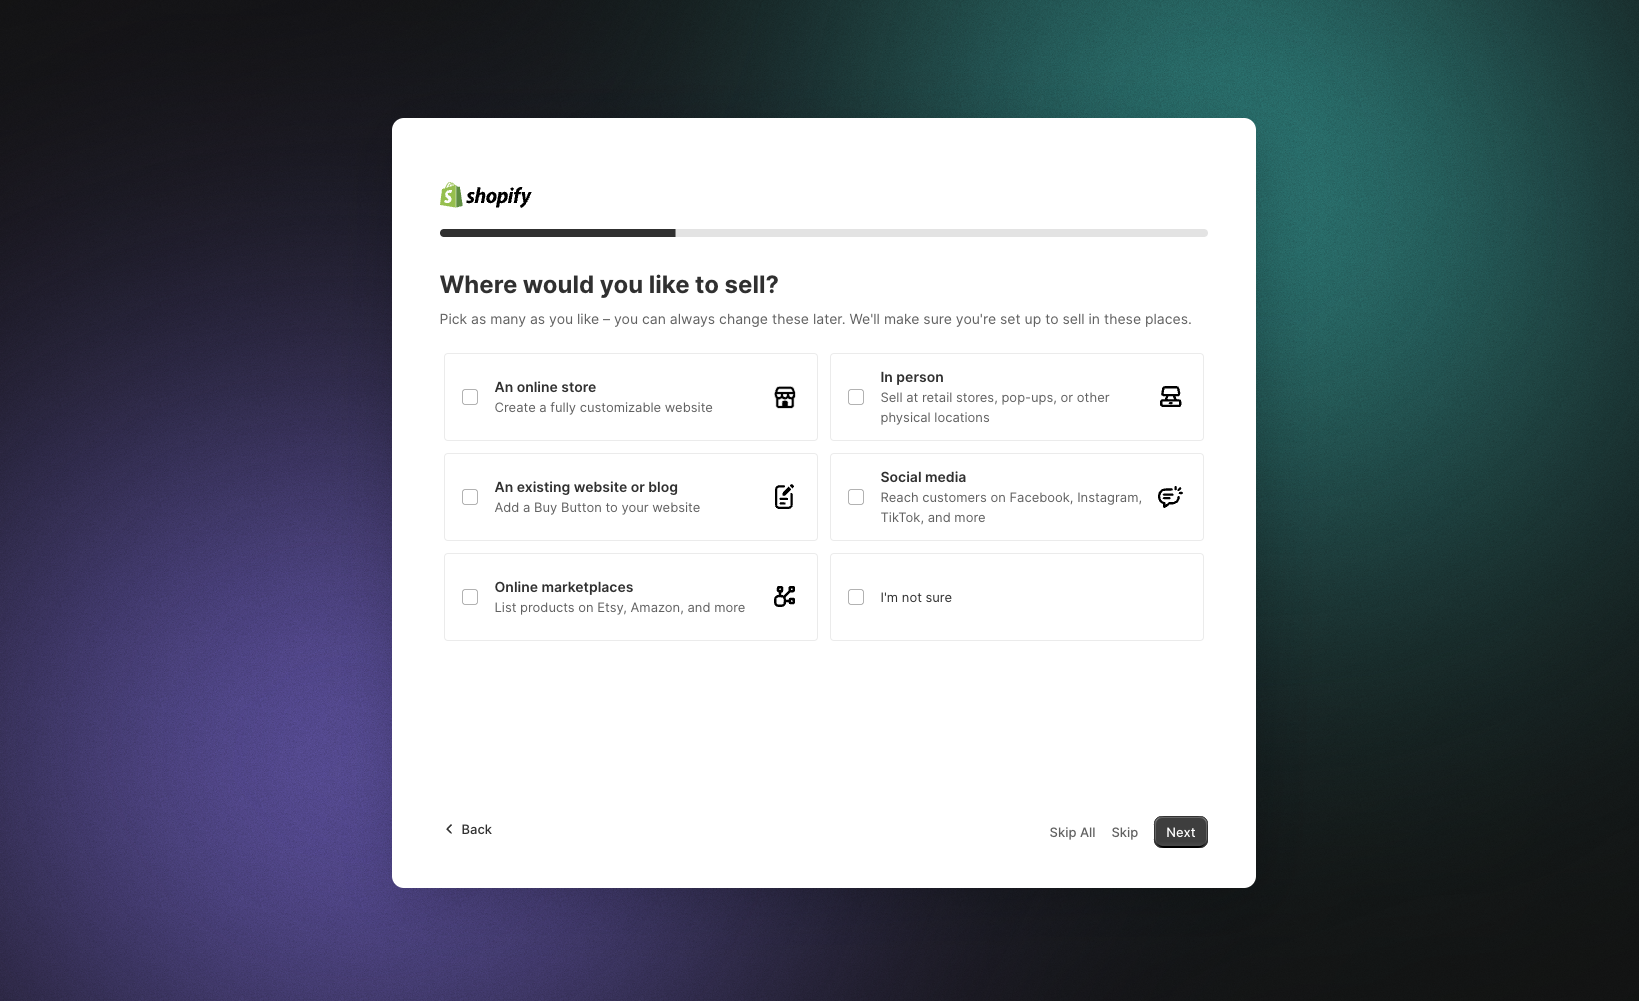
Shopify will ask you to answer a few simple questions about your business (this will take just a couple of minutes).
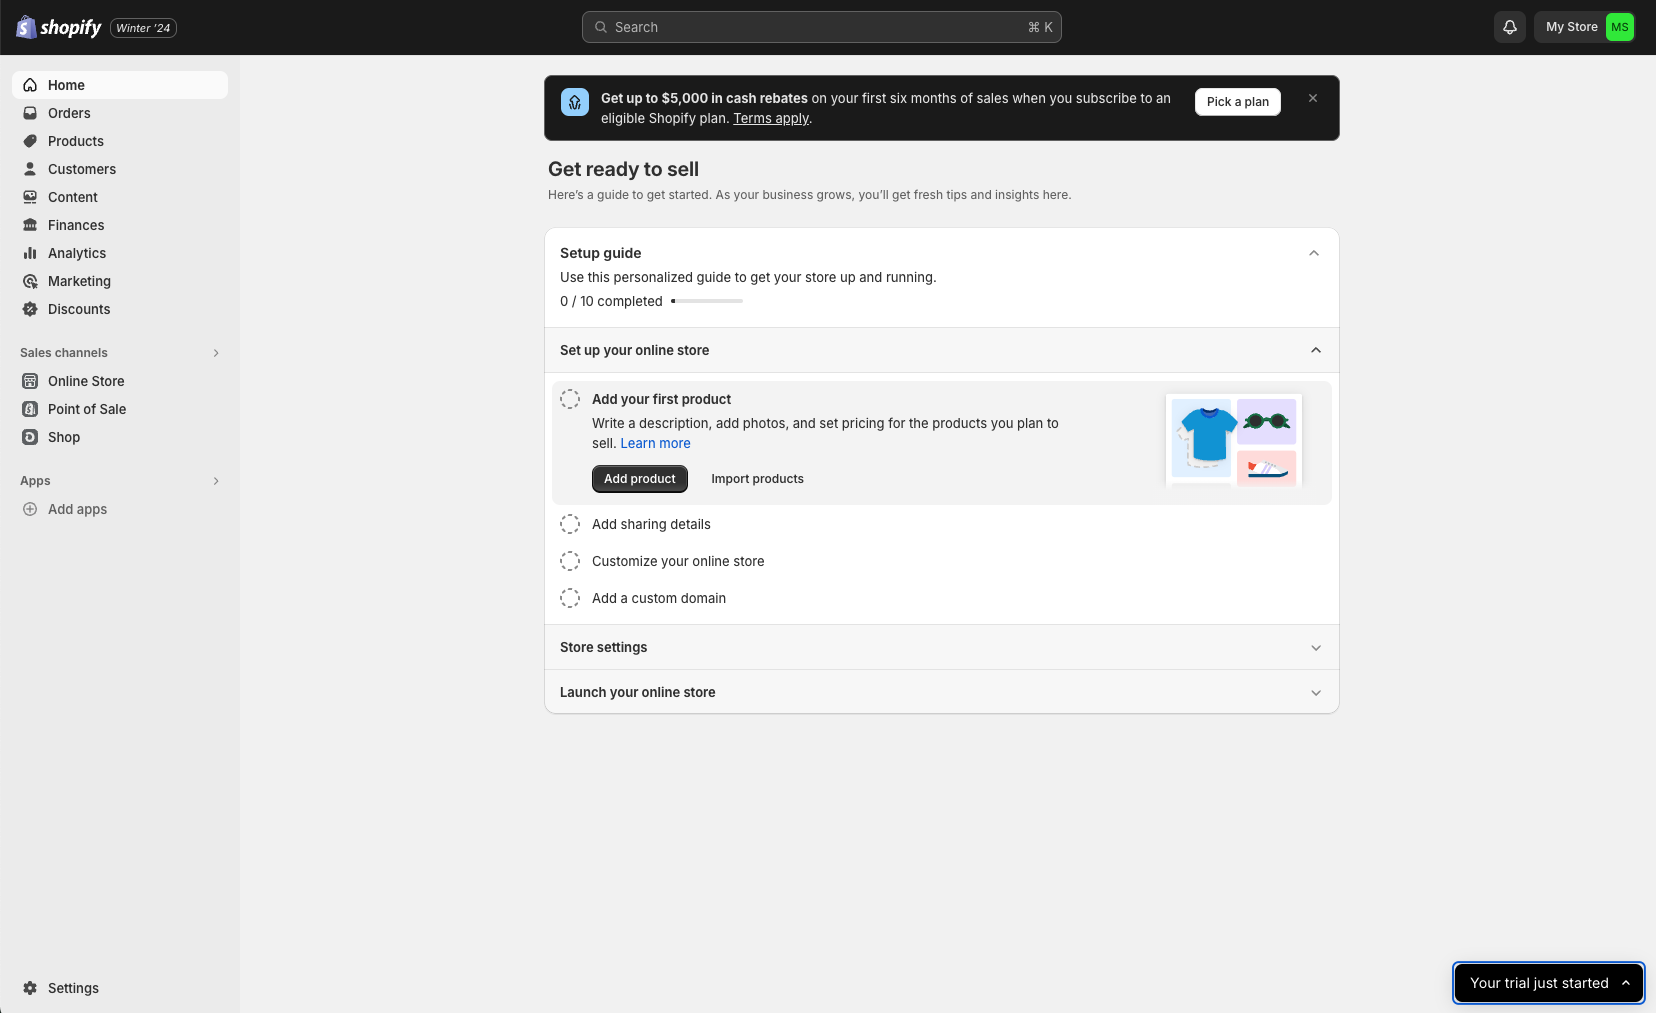
After answering the questions, you’ll be taken to your Shopify admin dashboard. You’ll see a menu on the left-hand side with tools like Orders, Products, and Customers. In the bottom left corner is the Settings button, which you’ll use to access and edit many of your store’s features.
Set Up Your Store and Domain
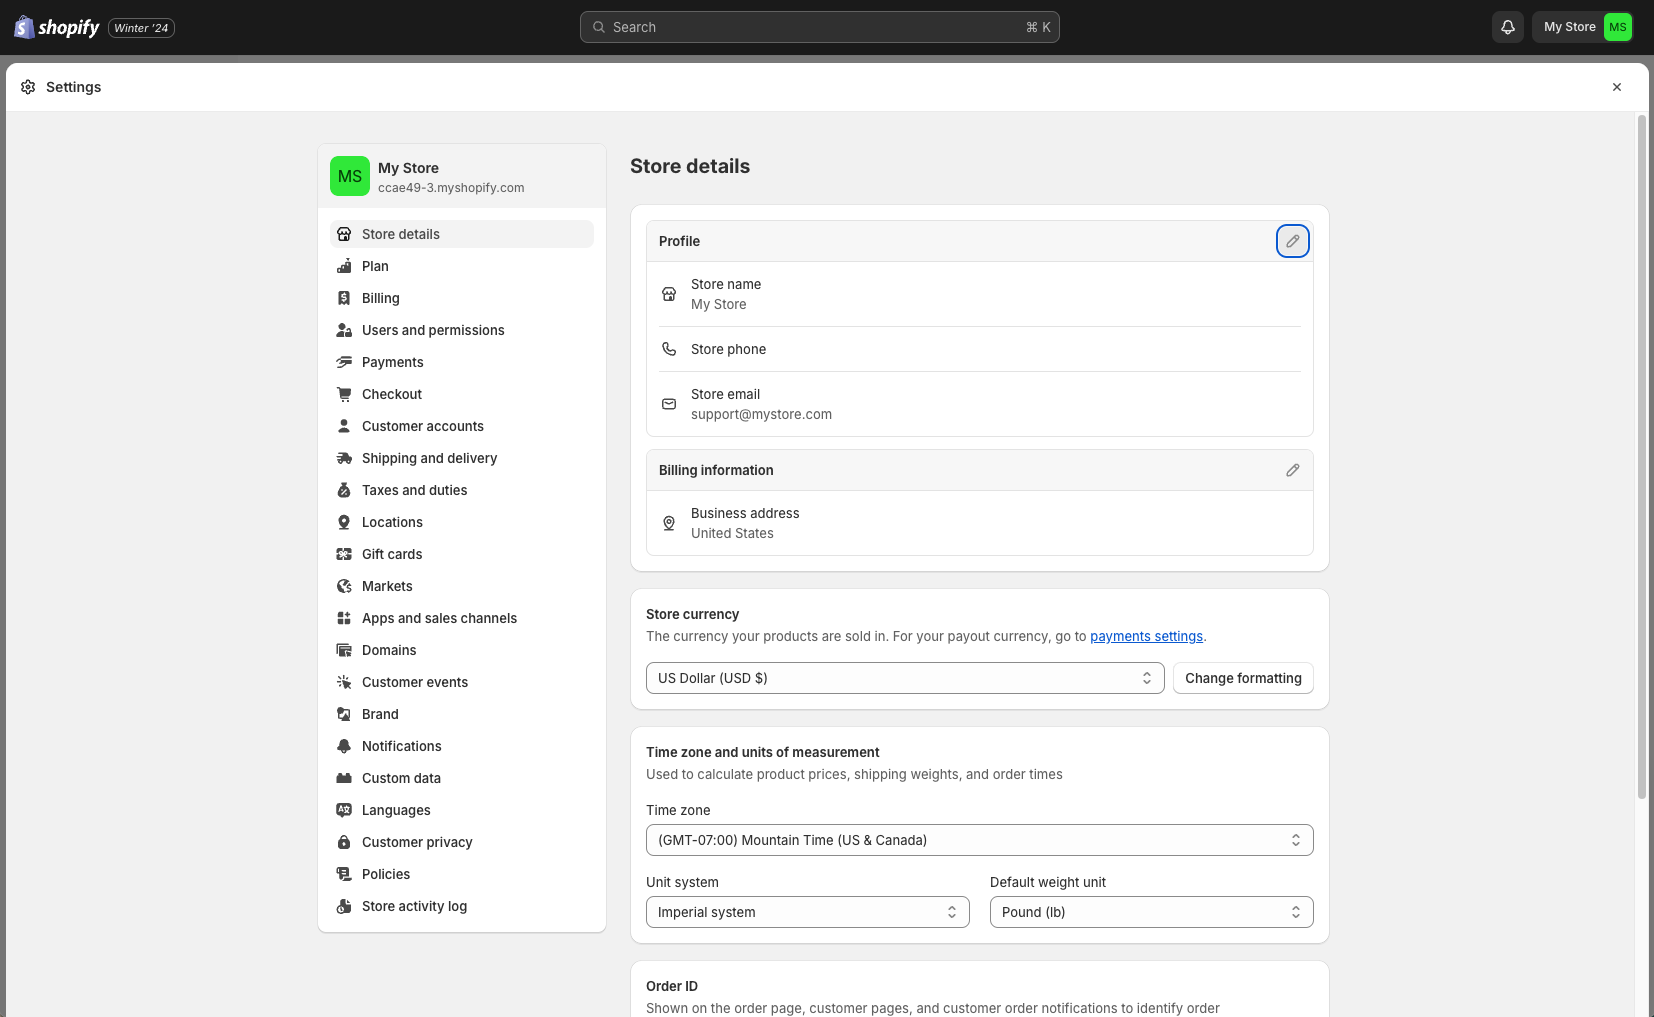
Once your account is set up, click Settings. The default settings window allows you to customize your store name, time zone, and currency.
Next it’s time to set up your domain, or the address people will use to access your site. Shopify provides two options for selecting a domain: you can buy a new one from Shopify or connect an existing one.
Just click Settings > Domains and choose whether to buy or connect a domain.
As you choose your domain name, keep the following guidelines in mind:
- Domains should be short, memorable, and relevant to your brand.
- Consider including keywords related to your site.
- If your preferred domain name is taken (you can check here), get creative with an alternative version.
- Choose wisely, because changing your domain name later isn’t a good idea.
Set Up Your Shopify Store Email
When you send email notifications to customers, you’ll want to use a business email address. After creating an email address using your new domain, you can link it to your store.
Click Settings > Notifications and add your email in the Sender email section. Now, delivery updates and similar customer notifications will be sent through that email address.
Step 2: Design Your Site
Before diving into site design, we recommend researching some competitor sites for ideas. See how their sites look and work, jotting down ideas for things you’d like to implement on your own store.
Once you have some basic plans, you’re ready to start exploring the Shopify Theme Store.
Choose a Theme (Layout)
Themes are like the bones of your website: they provide the underlying structure, and you can then customize the pages, products, colors, fonts, imagery, and other details.
To access themes, start from your admin dashboard. Then click Online Store > Themes.
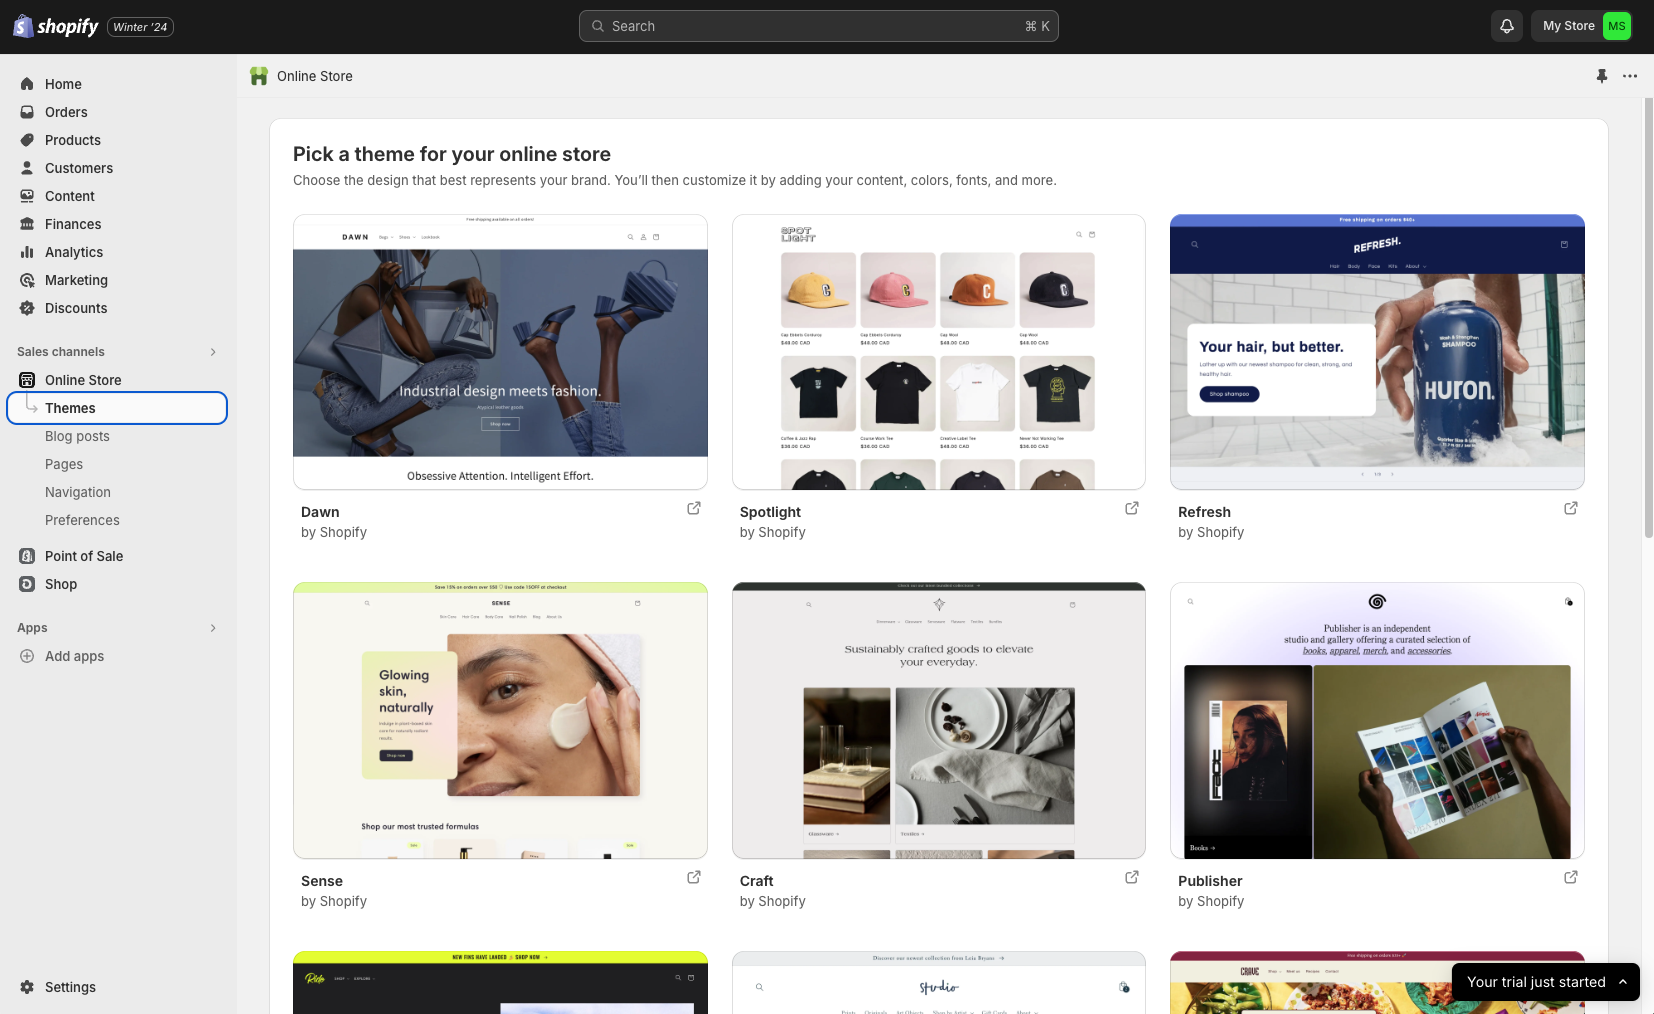
You’ll find some featured themes, and you can see more by scrolling down and clicking Visit Theme Store.
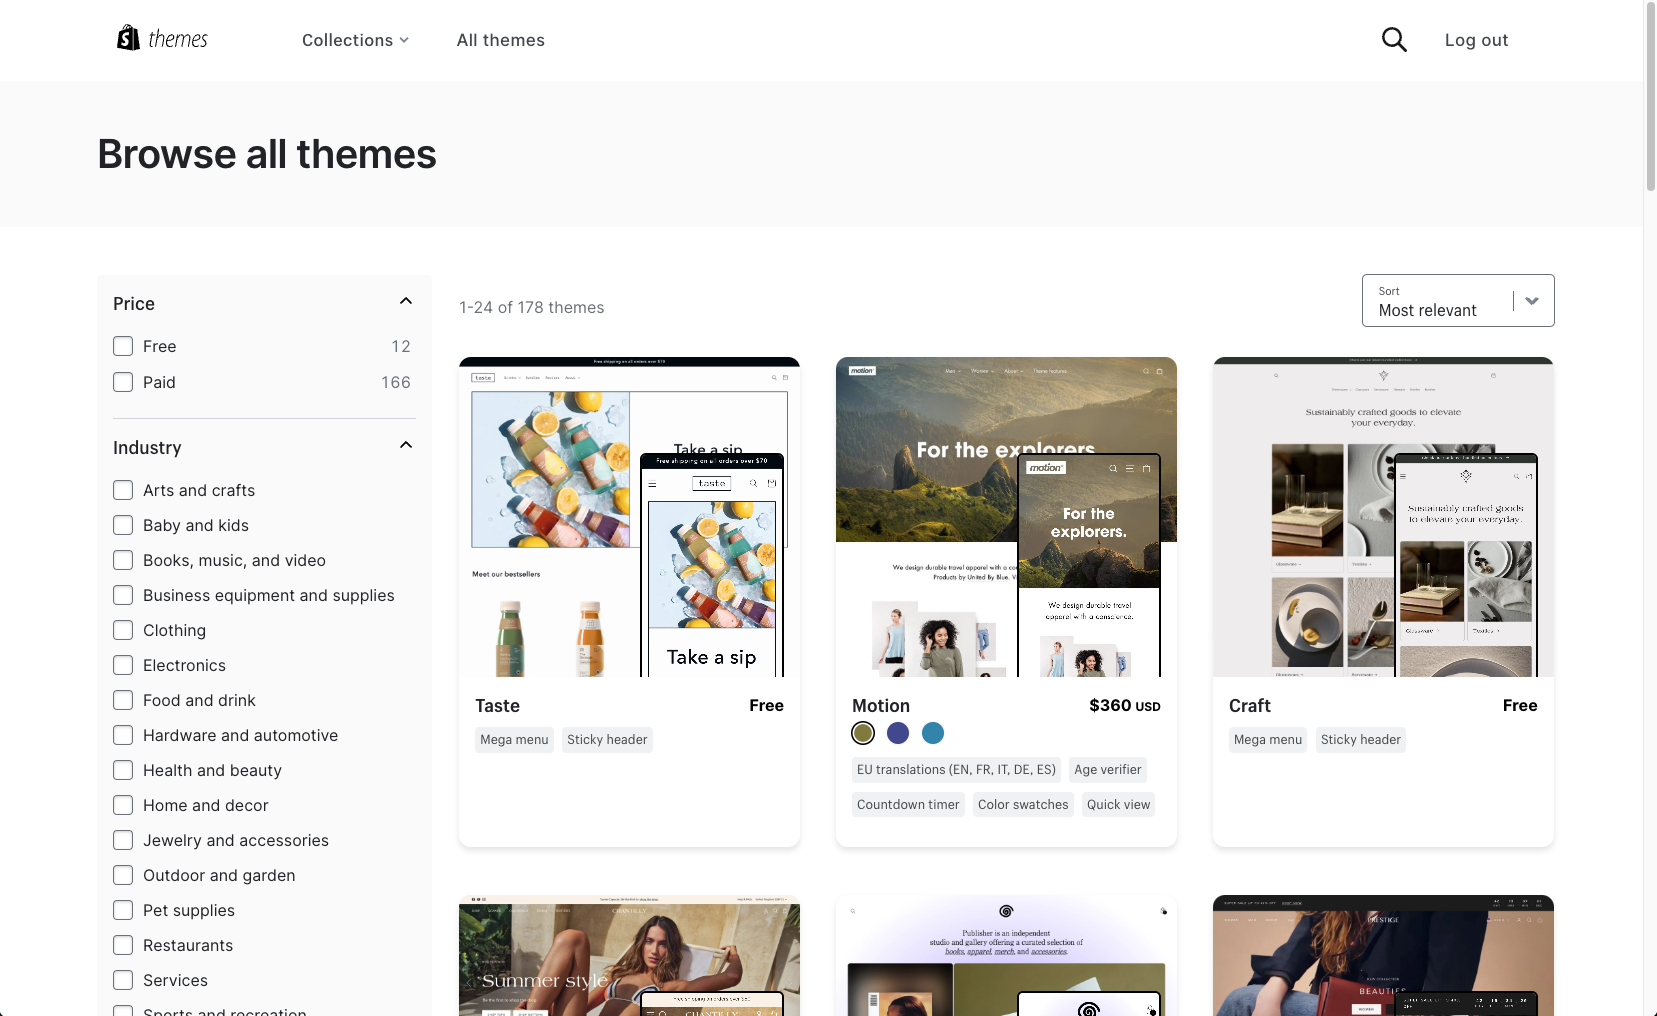
The store gives you access to over 150 themes, some free and some that cost money. As you browse potential themes, think about the following questions:
- Is the theme suitable for your brand, industry, and products?
- What customization options does it offer?
- Will the theme’s features help you meet your site goals?
Don’t worry about visual details yet—focus on the overall functionality of the theme first, since you’ll be able to customize the look and feel later. In the Theme Store, you can filter themes by cost, industry, catalog size, and features.
Once you’ve chosen a theme you like, select it and click Add Theme or Try Theme. You can test as many themes as you want before settling on the best one.
Customize Your Theme
It’s time to get creative by customizing your theme. Fortunately, Shopify makes this simple.
Starting from your admin dashboard, click Online Store > Themes. You’ll see your chosen theme in the middle of the page; click Customize. This will bring you to the theme editor, where you can add images and buttons, change text styles, and change other site elements.
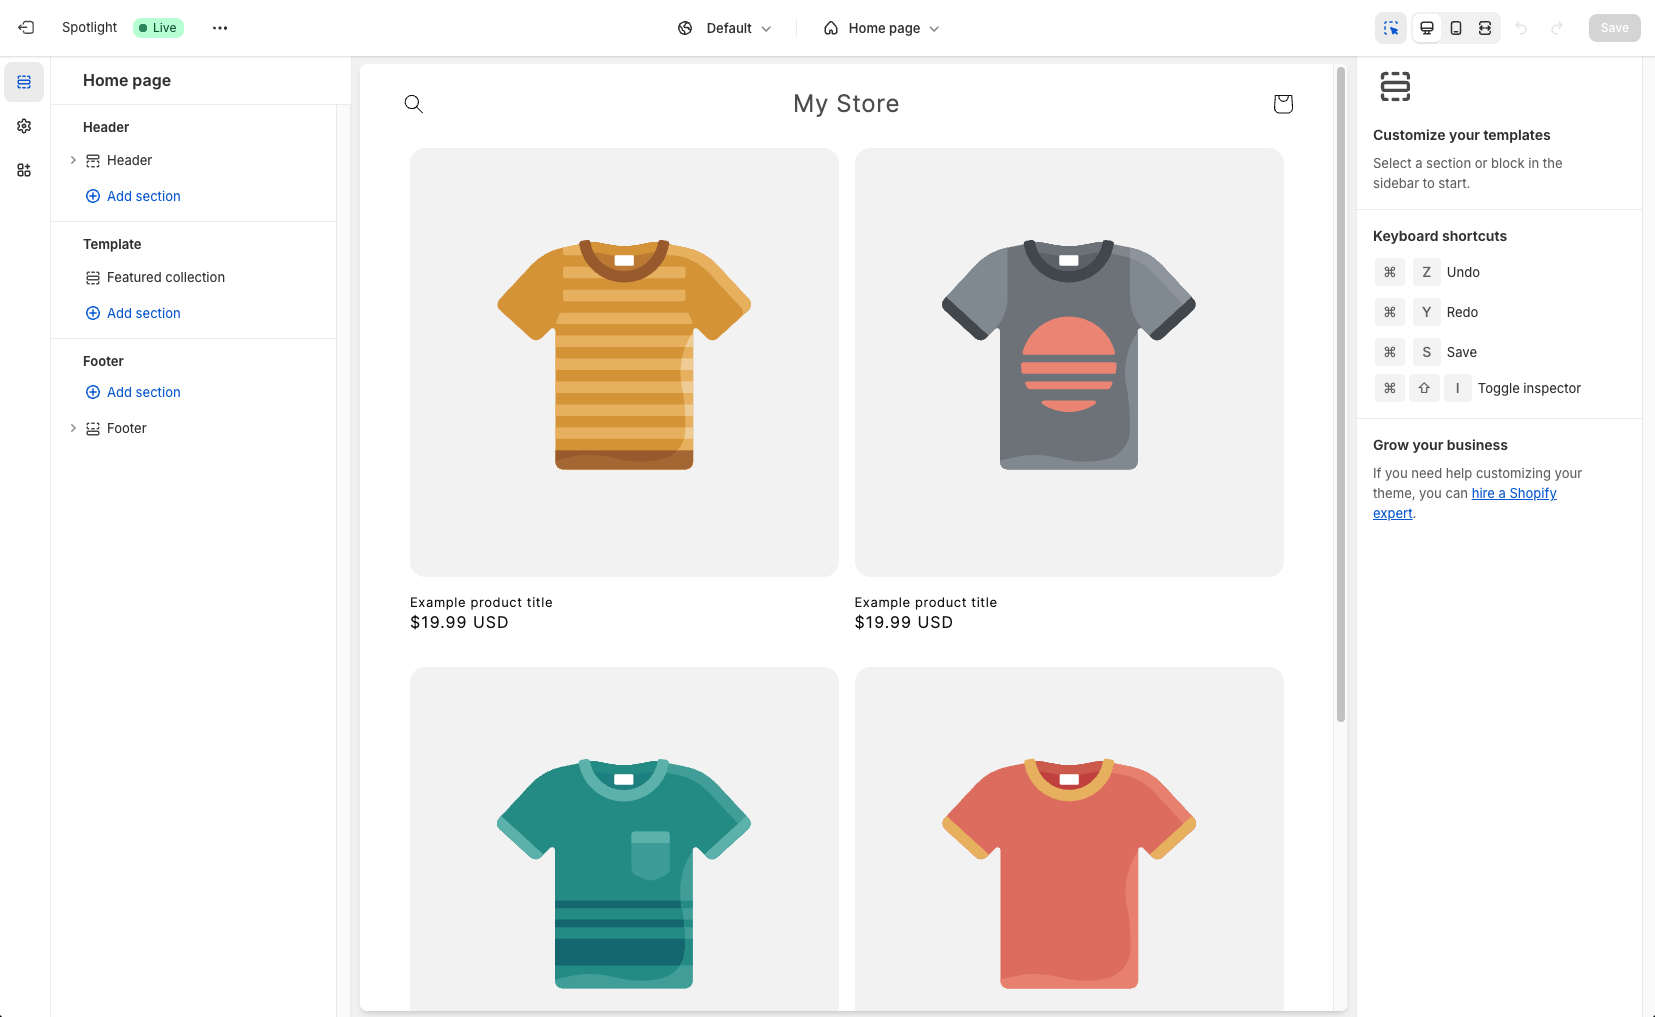
On the left side of the window, you’ll see a variety of editing tools. In the middle, you’ll get a preview of your theme. To edit, hover over sections (they’ll be highlighted in blue) and select the one you want to work on.
Add Products
Product pages are one of the most important elements of your website. In order to make sales, you’ll need to have well-designed product pages with detailed descriptions, clear images, and good reviews. Adding products to your Shopify store is easy.
From your admin dashboard, select Products, then click the Add product button.
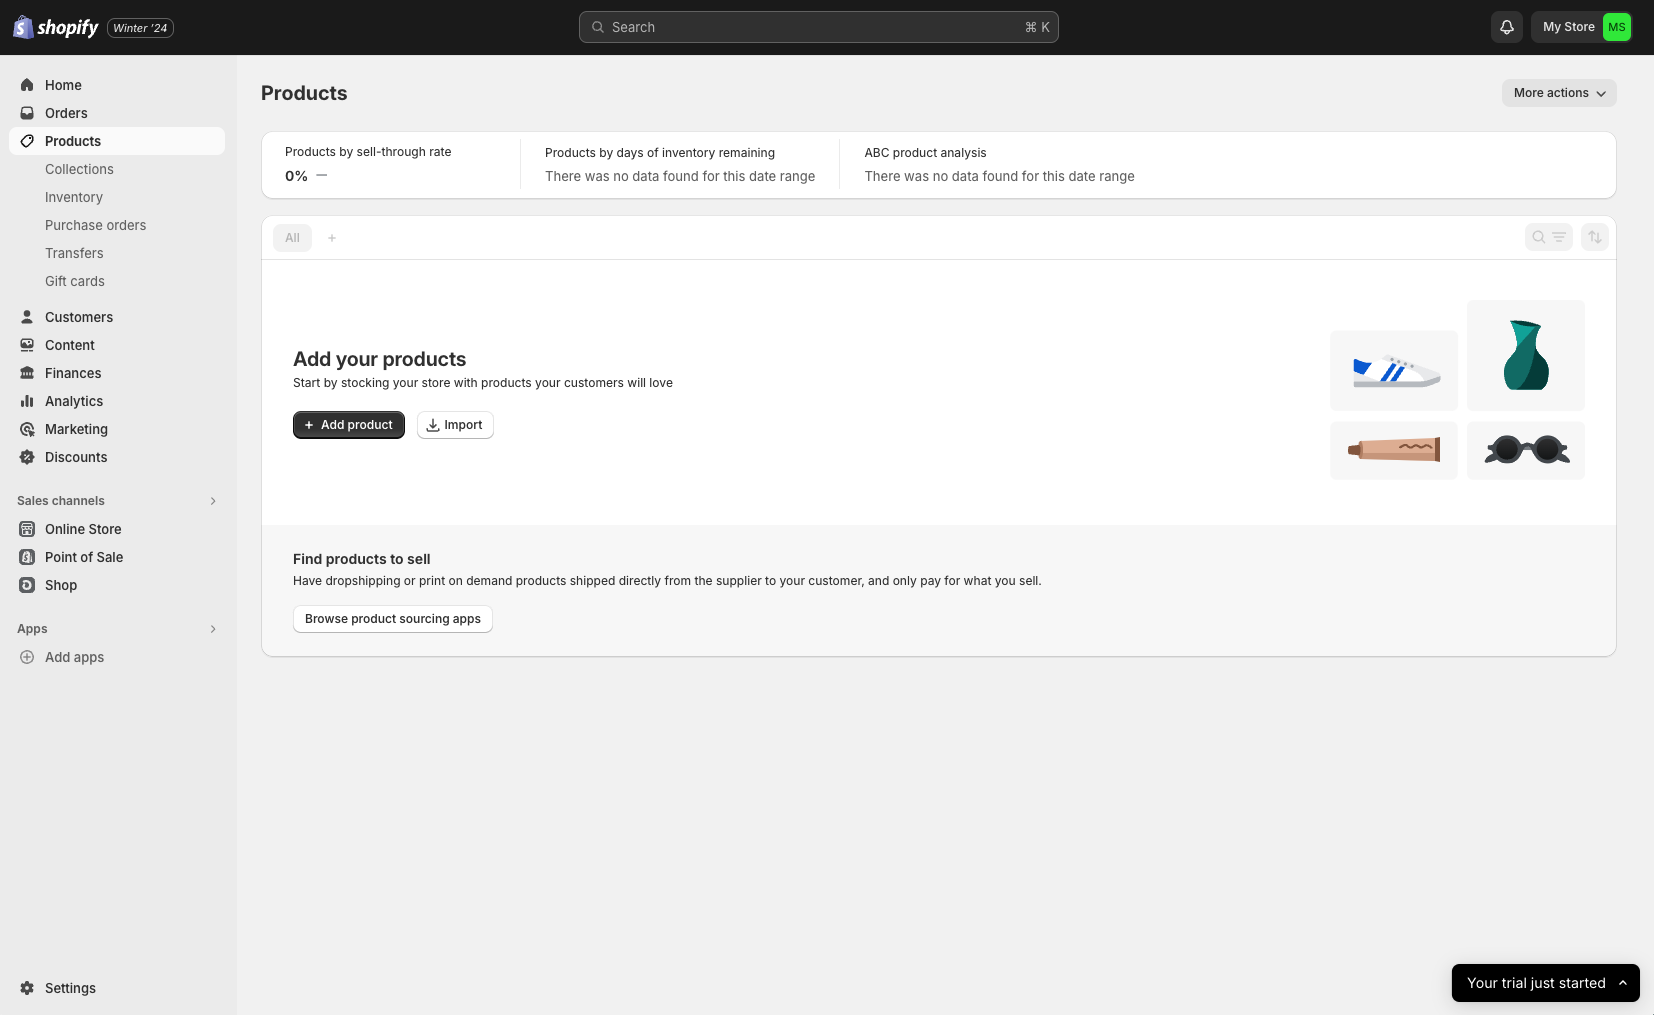
Once the product window opens, you’ll have space to add the following information:
- Title
- Description
- Media (images, videos or 3D models)
- Pricing
- Inventory
- Shipping information
- Variants (different colors, sizes, etc.)
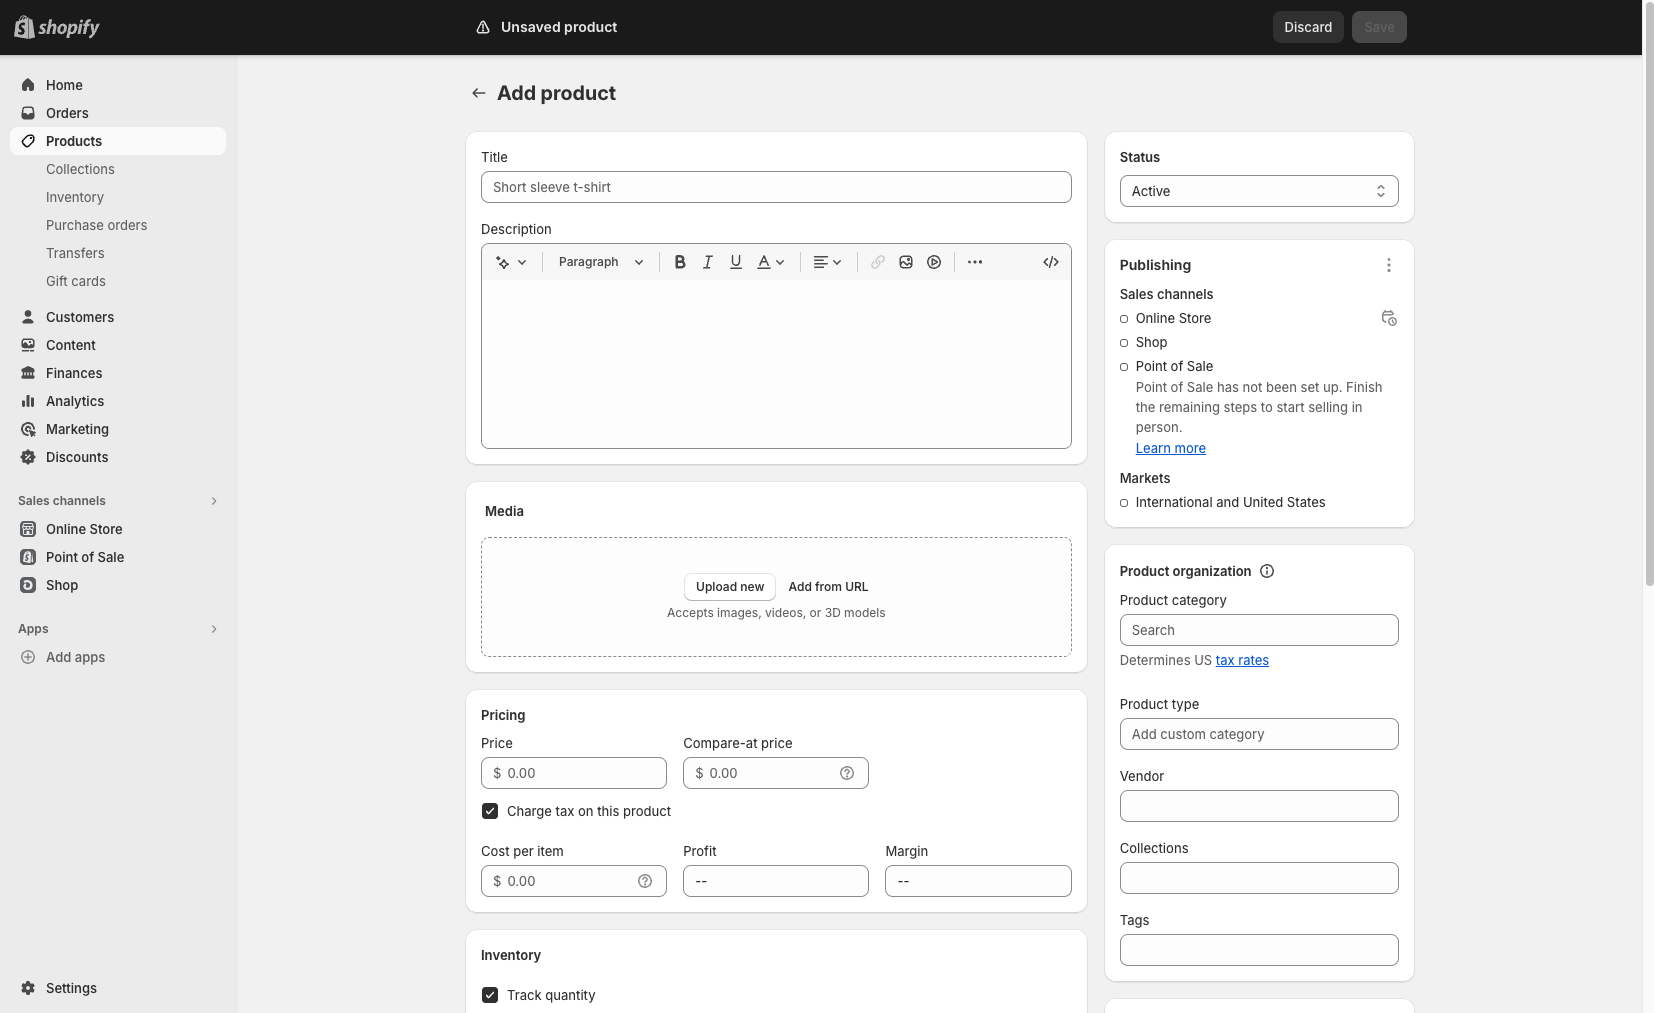
On the right-hand side of the window, you can change the product’s status (active vs. draft), channels you’re publishing to, and more. You can also add a category, which will help you sort your products into collections.
Organize Your Products
If your products aren’t organized logically, your store will be confusing to visitors. Help them find exactly what they’re looking for by putting products in different collections.
Go to Products > Collections, then click Create collection.
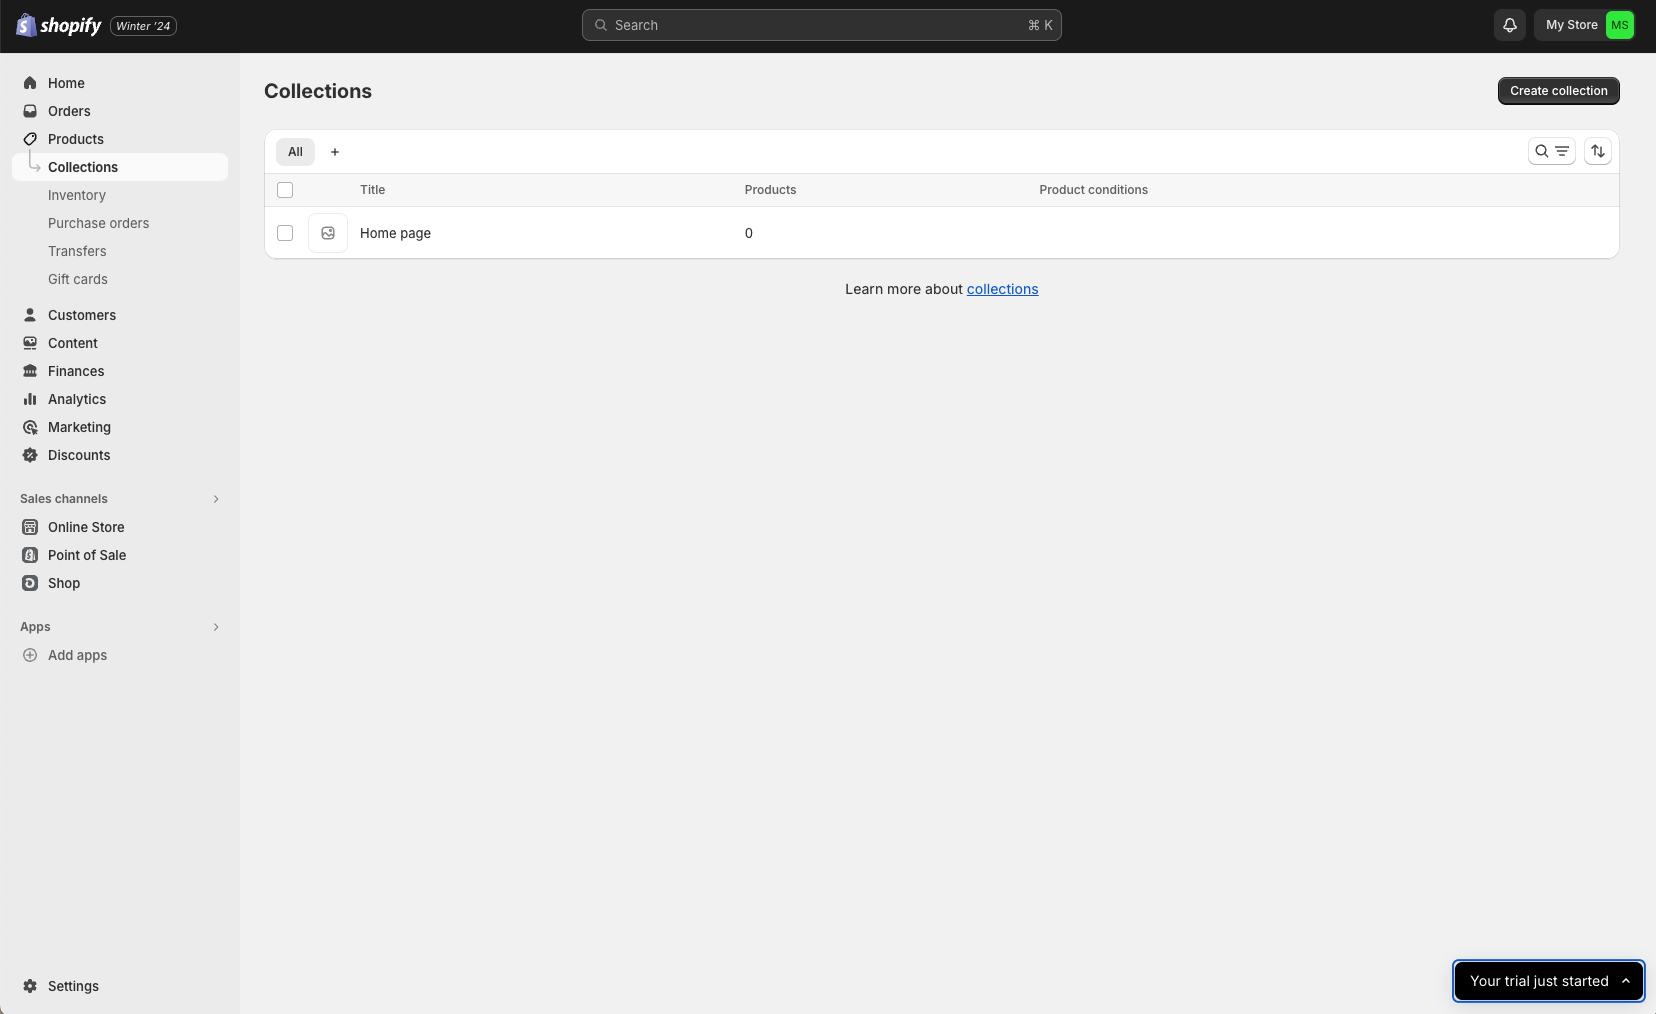
What sort of collections can you create? Shopify provides a few examples—Summer collection, Under $100, Staff picks—but the possibilities are endless!
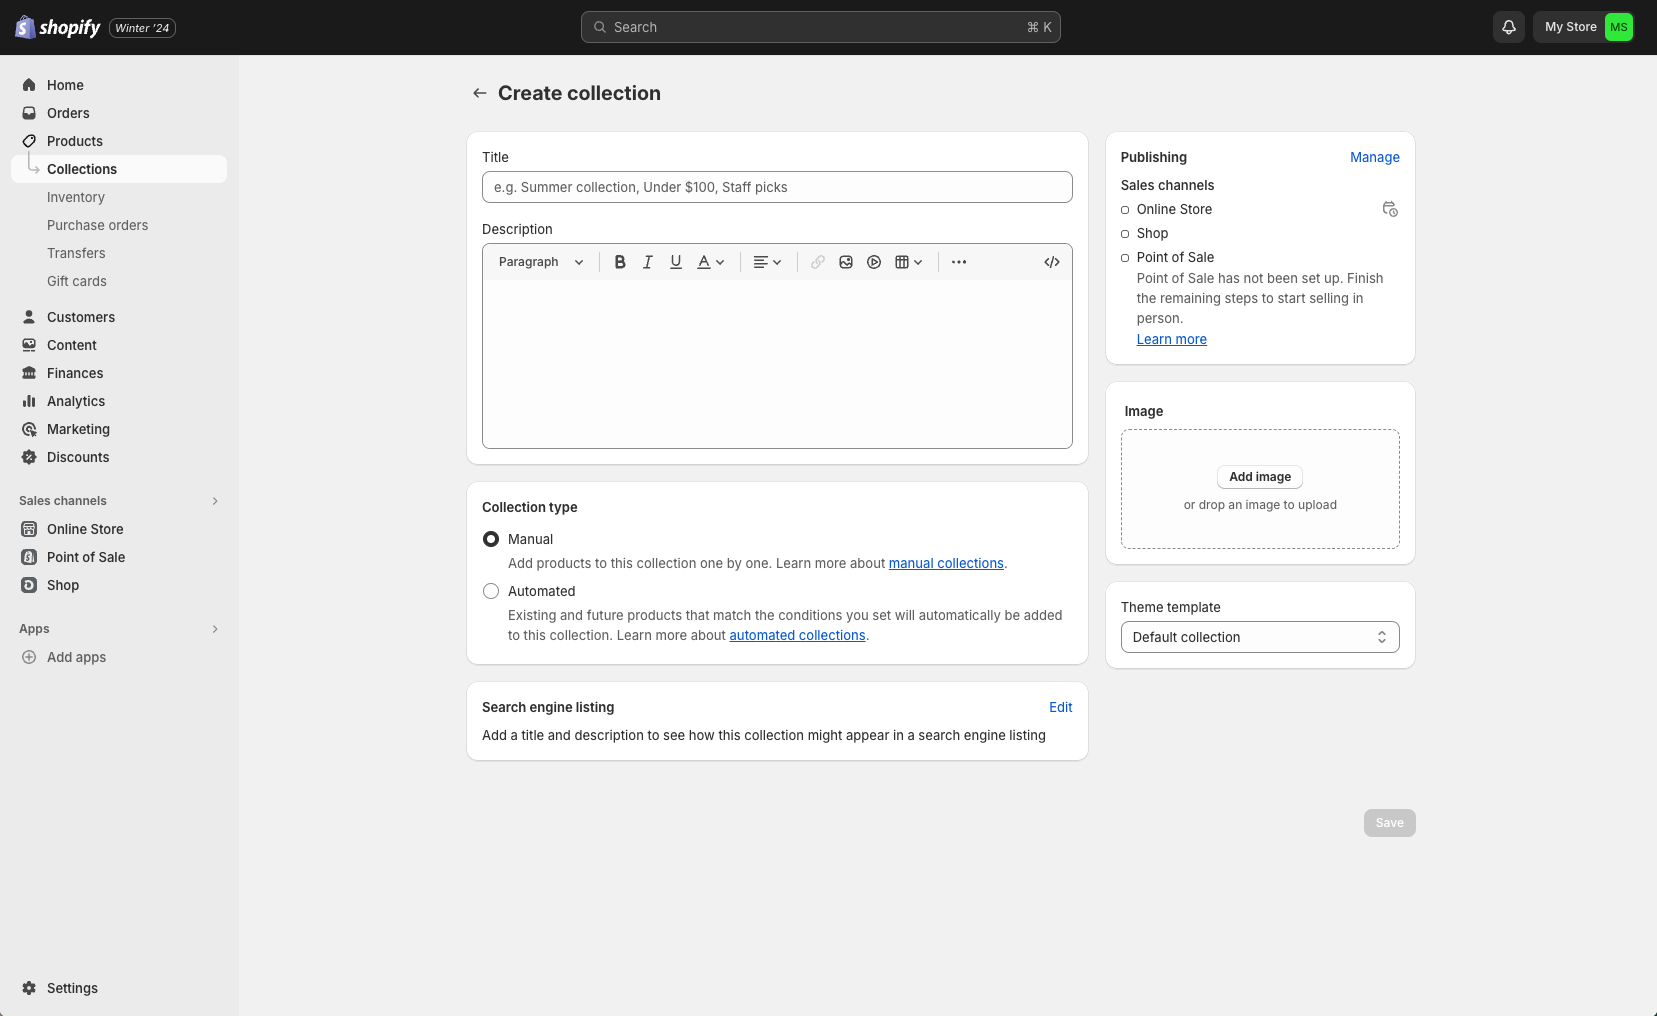
Once you’ve created a collection, you can automate it so existing and future products that meet certain requirements are automatically added. Try creating conditions based on price, inventory level, product category, and more.
Add Pages
In addition to having products, you may want to add other pages to your website.
Go to Online store > Pages and click the Add page button in the top right corner.
These pages will establish you as an authority, helping search engines understand the purpose of your store. You’ll probably want to include some (or all) of the following types of pages:
- Homepage. Clearly show who you are and what you do.
- About. Tell your brand story to give visitors a sense of your history and values.
- Contact. Give customers a way to get in touch with you.
- FAQ. Answer common questions about your products or policies.
- Policy. Communicate your policies on shipping, refunds, and returns.
- Trust-building content. Write blogs or guides to educate and entertain visitors.
Search engine optimization, or SEO, is the process of optimizing web pages to improve their visibility on search engine results pages. As an easy way to jumpstart your SEO strategy, make sure your page content is relevant to your industry and brand. To take things a step further, use a keyword research tool to see how often people search for brand-related terms, then include those words on your pages.
You’re nearly finished with setup! Before launching your store, take care of a few final details.
Step 3: Figure Out the Site Logistics
Once the following tasks are completed, you’ll be ready to go live and start selling your products.
Payment Options
All Shopify plans include Shopify Payments, which lets you accept credit cards without needing to add third-party apps. Just go to Settings > Payments and click Complete account setup in order to start accepting payments.
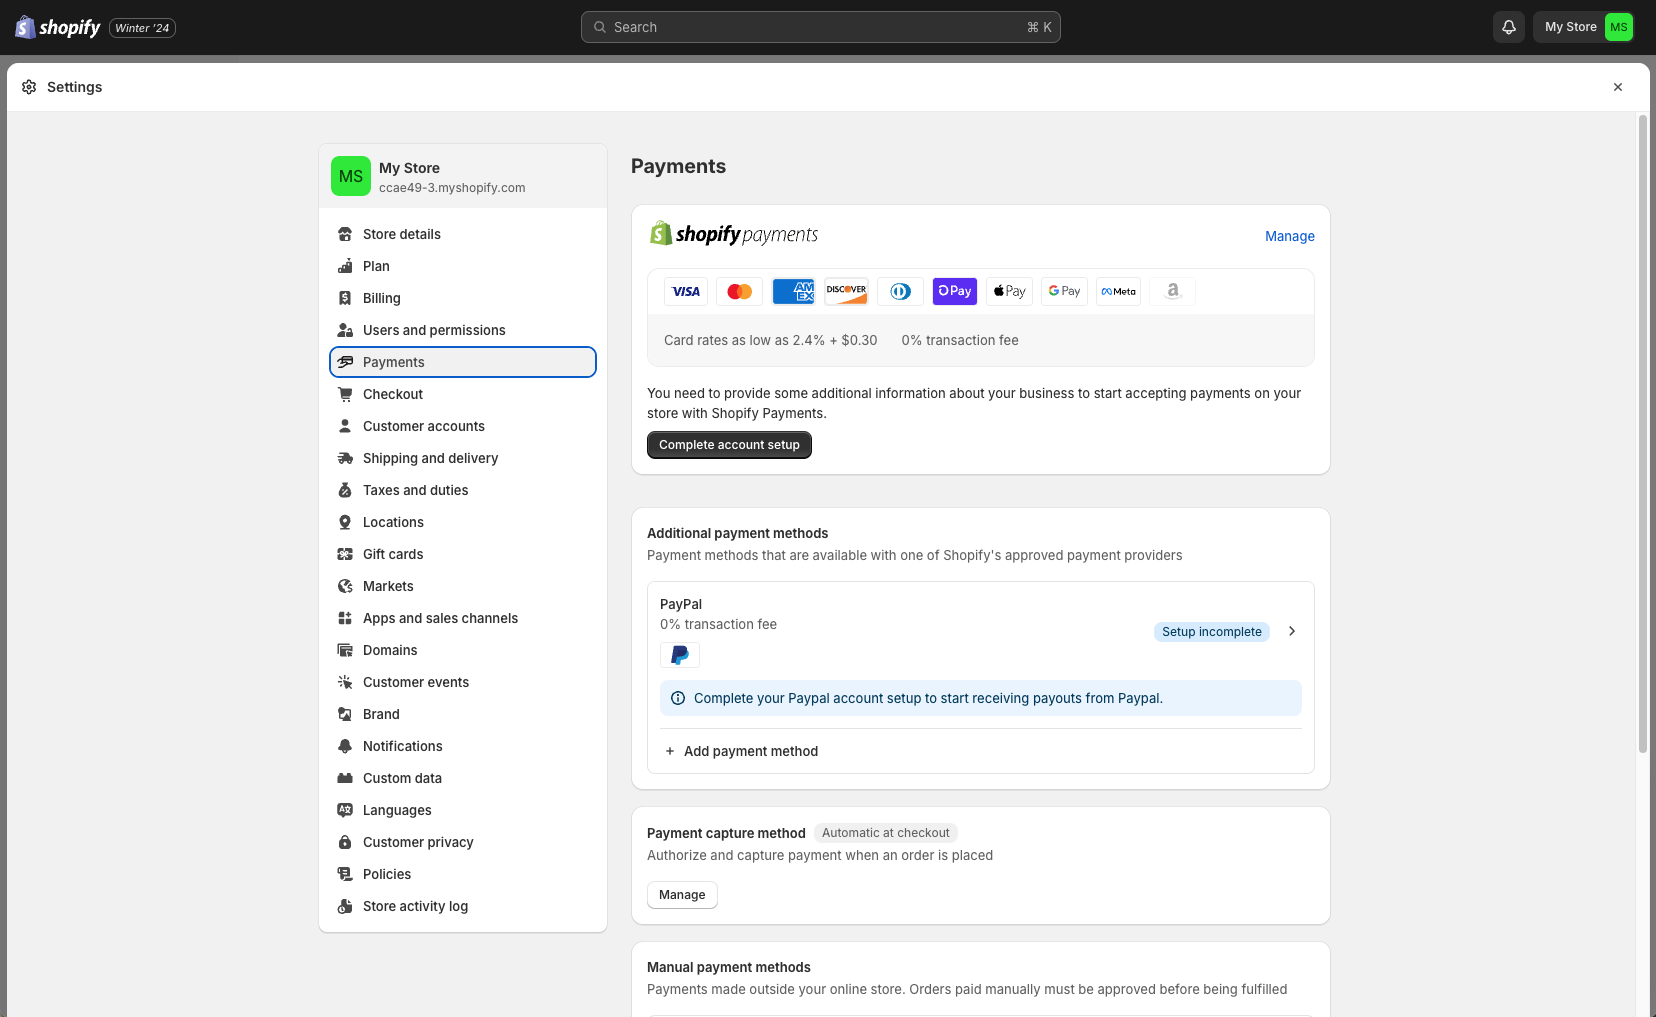
If you’d like to add other payment options, like PayPal or Afterpay, go to the Additional payment methods section and click the + Add payment method button.
Sales Tax
Depending on your country, state, and region, you might need to collect sales tax, then report and pay those taxes to the government. Shopify uses default tax rates, but it’s your responsibility to confirm that the rates are correct based on your circumstances.
To change your tax information, go to Settings > Duties and taxes.
While Shopify can automatically calculate and collect sales tax, it doesn’t file or remit taxes for you. For that, you’ll need to register your business with local and federal authorities (Shopify will generate reports that make it easier to file taxes).
We recommend consulting a tax professional to ensure you’re handling sales tax correctly.
Shipping
Shipping is a crucial part of your ecommerce strategy. It’s not as simple as putting products in boxes and dropping them in the mail; you need to carefully calculate shipping costs so you know what to charge customers.
You have three main options for determining shipping costs:
- Flat-rate shipping. Set a flat shipping price for all your products, or set price- or weight-based conditions that display a shipping cost at checkout. Using this method, you determine prices yourself. For example, you might decide that based on the average cost to ship a package, you’ll charge $6 per shipment.
- Free shipping. Determine how much shipping will cost, and include that in your product prices. This lets customers see exactly how much they’ll be paying upfront but doesn’t cut into your margins.
- Carrier-calculated shipping. Calculate shipping costs at checkout based on the exact rate carriers will charge to ship the package.
To set up shipping, go to Settings > Shipping and delivery.
Here, you’ll be able to view and edit shipping details, including rates, delivery date visibility, delivery and pickup locations, and more.
To automatically connect your account to Shopify’s carrier accounts, activate Shopify Shipping. Keep in mind that while Shopify Shipping can help minimize shipping hassles, its features are limited. As your business grows, it may become more cost-effective to integrate with carriers using third-party shipping software.
Finalize Metadata for Search Engine Listings
Metadata helps search engines index and rank web pages. Well-optimized metadata will improve the visibility of products in search engine results, attracting more potential customers to your store.
To add metadata to your website, go to Online Store > Preferences. Then fill in the Homepage title and Homepage meta description fields. Since you have a limited character count, keep your title and description clear and concise, and for best results, include relevant keywords.
Step 4: Launch and Test Your Store
While you’re developing your store, it will be password-protected so nobody can view it but you. When you’re ready to launch, just remove the password.
Go to Online store > Preferences and scroll down to the Password protection section. If you’re still on your free trial, you’ll need to choose a Shopify plan before opening your store up to the public.
Once your store is live, make sure all the content loads and links work across different devices and internet connections. Next, place a test order to see how the checkout and payment processes work. You’ll be able to catch any issues with order processing, tax calculations, shipping, and email notifications. Shopify provides a few options for placing a test order; learn more about them here.
As you become more familiar with your Shopify store, you’ll eventually dive deeper into marketing, ads, and analytics. Experimenting with new strategies and approaches will bring in new customers and give them a great shopping experience.
For in-depth advice on making more sales, check out our ecommerce conversion rate optimization article.
Shopify Apps and Plugins To Take Advantage Of
With over 8,000 add-ons available in the Shopify App Store, you can unlock some pretty amazing features. These third-party apps expand your store’s capabilities, letting you customize your website to make it work the way you want.
They can help with things like:
- Store design
- Email marketing
- Product reviews
- Sales and conversions
- Customer service
- Loyalty and rewards
Since you’re just getting started with your website, we’ll recommend a few apps that can provide some essential functionality for your store.
Norton Shopping Guarantee with Package Protection by EasyPost
Norton Shopping Guarantee with Package Protection by EasyPost builds trust with site visitors, giving them the confidence to make a purchase.
Sitewide trust badges show potential customers that your business has been independently verified by a third party—but the real power comes from the combination of package protection and a shopping guarantee. If a customer chooses to add package protection at checkout, they’ll be reimbursed if their delivery gets lost, stolen, or damaged.
Klaviyo: Email Marketing and SMS
As you begin building up your marketing strategy, you’ll need a way to communicate with potential customers. That’s where Klaviyo can help! It’s a marketing platform that helps businesses grow efficiently by leveraging customer data.
Klaviyo offers personalized email and SMS campaigns and provides AI tools, templates, benchmarks, and support for customer engagement across channels.
Judge.me Product Reviews
Judge.me is a product review platform that helps drive sales through social proof. With features like unlimited email review requests, customizable widgets, and social media sharing capabilities, it allows you to collect and display product reviews and star ratings in 38 languages.
Have Fun, Learn, and Enjoy the Process
And that’s it! You know how to build a website on Shopify, and your store is yours to design, add to, advertise, and play with. With so many possibilities at your fingertips, you might feel overwhelmed. But the internet offers an enormous collection of resources to help make your store successful. Not sure where to start? We recommend searching the Shopify Help Center to learn more about your site’s features.
Of course, your website might take some time to gain traction. When stores don’t have much brand recognition, some customers will hesitate to make a purchase. To overcome this hurdle, download Norton Shopping Guarantee with Package Protection by EasyPost. With sitewide trust badges and optional package protection (at no cost to you), the app will give your website the credibility it needs to attract and convert customers.

.png)
.png)